The guide will give you the hard specs on the LiDAR as well as a good explanation on Key Terms: detection range, multiple returns, point cloud rate, scanning mode, scanning pattern and more.
One area of note is the application scenarios for the L2. This walks you though the RTK and PPK scenarios including NTRIP, D-RTK 2 and third party base stations. It doesn't go over third party base stations that can communicate in real time such as the Emlid Reach RS2+ and RS3. There is a walk through check points including layout. Then, the manual moves on to route planning, including payload parameters such as return mode and scanning mode.
We'll then receive DJI recommended parameters for various scenarios including: high accuracy in plain areas, high accuracy in hilly areas, high accuracy in forested areas, high efficiency in those areas, and forests. One piece to note is the altitude in all scenarios is 80 meters or higher. Typically we suggest flying closer to 50 meters for the highest accuracy levels. Beyond that, maximum returns are recommended except in high efficiency plane and hilly areas. The only time the non-repetitive scanning is recommended is in forests.
Next the manual goes through data processing in DJI Terra. This gives a good guide on RAM needed based on the size of the point cloud. It goes into detail on PPK processing next and has a good walk through the settings.
The manual then goes into manual flights using the L2 and the parameters recommended.
An entire section is dedicated to power line scenarios using the L2 LiDAR.
More details on the D-RTK 2 are given in later on.
All in all this a good resource, and a good starting point to go off of and modify to tailor your specific needs.
]]>
Using Emlid Flow, confirm that your Base is outputting over LoRa and take note of the frequency.
For repeatability start a New Project and collect a point with your receiver in one of three ways:
MicroSurvey FieldGenius for Android is our most recommended software for use with Emlid Reach GNSS Receivers. There are a wide range of data collectors that are compatible with the RS3, but only Emlid Flow and FGA can utilize the tilt compensation.
]]>Configuring the Base
Configuring the Rover
After this setup, the RS3 will now function in FieldGenius the same way it does in Emlid Flow. The deviations, PDOP, and tilt compensation status are listed in the top status bar. Once you are receiving corrections and you have your fix, you can begin your workflow.
]]>E38 has been selling and supporting Emlid products since 2016.
Event 38 Unmanned Systems integrated the first generation Reach receiver into the E384 in 2016. Fast forward three years, and Emlid launches the Reach RS2. Soon after E38 Survey Solutions was created to service the needs of positioning customers using the RS2s and associated equipment. All that to say, E38 Survey Solutions has been supporting these Emlid receivers since the beginning, and it has been the main focus for us since 2019. We know there capabilities and limitations not only of the hardware itself, but of various other software and hardware integrations. We can work with Emlid on your behalf on anything warranty related as well.
Why is E38 Survey Solutions supporting all Emlid customers no matter who they purchased from?
Because we believe you'll give us a chance at your business when you are in the market for another receiver, field software, a new drone, LiDAR, robot, or CAD software.
If you need any help with your Emlid receiver, let us know. It won't cost you a dime, and we're just a phone call away. You can reach us 8 AM - 4 PM Eastern Time.
If it is outside of working hours and you need help, browse our YouTube channel.
]]>In this data set we will see 3D model results specifically for a cell tower and an office building.
The cell tower imagery was collected using a combination of manual flying and Hammer Missions. This resulted in 642 images being captured. The images can be found here. The cell tower data came out pretty well considering the difficulty in modeling towers. We ran this data set through another popular software, and it was not pretty.
The building imagery was collected using the oblique mission in DJI Pilot. 314 images were captured and this sample data for the building can be found here. The 3D model came out really well, with very crisp edges, and cars that look more like cars than blobs.
All the imagery was processed using Skyline software. Skyline is very impressive when it comes to 3D modeling as can be seen in this project. You can see the finished result here. Beyond 3D models, Skyline is also able to scale to the point of being able to handle projects of virtually any size. Processing and viewing the results of entire cities can be handled with ease.
]]>The IMU in each RS3 is factory calibrated, so you don't have to calibrate in the field. The IMU accuracy spec is 2 mm + 0.3 mm/°.
To test the accuracy of the RS3s tilt compensation, we compared plumb shots with tilt shots, and compared those two shots.
At each location the Reach RS3 tilt compensation was disabled and a shot was taken with a plumb rod. Next the tilt was enabled on the same location and a shot was taken with a plumb rod. Lastly the rod was tilted and a shot was recorded.
The root mean squared error in feet for the RS3 with a plumb rod with tilt turned on in the Northing, Easting and Elevation, was 0.07', 0.05', and 0.02' respectively.
The root mean squared error in feet for the RS3 with a tilted rod with tilt turned on in the Northing, Easting and Elevation, was 0.05', 0.06', and 0.04' respectively.
The results of this test show that the RS3 maintains high accuracy using the tilt compensation.
The shot-by-shot results are shown below.
GNSS Tilt Disabled | |||
100 | 572463.89 | 2205771.303 | 1160.333 |
101 | 572471.224 | 2205761.826 | 1160.442 |
102 | 572478.655 | 2205761.666 | 1160.809 |
103 | 572486.067 | 2205761.538 | 1161.274 |
104 | 572493.455 | 2205761.406 | 1161.673 |
105 | 572500.845 | 2205761.317 | 1162.036 |
106 | 572510.78 | 2205761.158 | 1162.182 |
107 | 572519.851 | 2205761.126 | 1162.227 |
108 | 572528.968 | 2205761.068 | 1162.344 |
109 | 572537.515 | 2205760.998 | 1162.466 |
Tilt Enabled, Plumb Rod | |||
OFS_0001 | 572463.81 | 2205771.342 | 1160.318 |
OFS_0002 | 572471.273 | 2205761.885 | 1160.424 |
OFS_0003 | 572478.713 | 2205761.757 | 1160.796 |
OFS_0004 | 572486.105 | 2205761.617 | 1161.263 |
OFS_0005 | 572493.489 | 2205761.482 | 1161.65 |
OFS_0006 | 572500.885 | 2205761.388 | 1162.054 |
OFS_0007 | 572510.833 | 2205761.225 | 1162.164 |
OFS_0008 | 572519.897 | 2205761.201 | 1162.202 |
OFS_0009 | 572529.019 | 2205761.122 | 1162.346 |
OFS_0010 | 572537.561 | 2205761.051 | 1162.489 |
Tilt Enabled, Tilted Rod | |||
200 | 572463.77 | 2205771.332 | 1160.297 |
201 | 572471.267 | 2205761.838 | 1160.41 |
202 | 572478.68 | 2205761.72 | 1160.794 |
203 | 572486.106 | 2205761.589 | 1161.259 |
204 | 572493.492 | 2205761.468 | 1161.645 |
205 | 572500.889 | 2205761.355 | 1162.047 |
206 | 572510.832 | 2205761.241 | 1162.232 |
207 | 572519.908 | 2205761.155 | 1162.261 |
208 | 572529.012 | 2205761.096 | 1162.297 |
209 | 572537.567 | 2205761.02 | 1162.394 |
In this series of case studies we will look at the accuracy of the data in different scenarios. In the first we will look at performance on hard surfaces. The Emlid Reach RS2+ was used as a base station on a known point, logging raw data for processing. The DJI M300 RTK carried the XT32, flying at an altitude of 165 ft and a speed of 11 mph. This results in about 2 acres of coverage per minute of flight.
PCMaster is used to create an LAS file from the raw data stored on the RESEPI and from the base station. No smoothing, noise reduction, or point cloud manipulation at all was performed. The strength of the RESEPI XT32 is in its ability to generate high quality results in their raw form. This results in the most consistent data as compared to using smoothing/noise reduction which can in some cases degrade, rather than improve the data.
Check shots were collected with the GeoMax Zoom95 robotic total station. When the check shots are imported they use the nearest LiDAR point and provide the elevation difference. It is automated, so there in no manual input of which points are being compared to each other.
First we will look at all the hard surface shots.
The RMSE on the 28 hard shots is 0.037 feet.
LIDAR_ELEV | ELEVATION | ELEV_DIFF | ELEV_DIFF_ABS |
319.2807 m | 319.3121376 | -0.0315 m | 0.0315 m |
320.713 m | 320.6916624 | 0.0213 m | 0.0213 m |
319.2994 m | 319.2783048 | 0.0211 m | 0.0211 m |
319.2637 m | 319.2798288 | -0.0161 m | 0.0161 m |
319.7273 m | 319.7117304 | 0.0155 m | 0.0155 m |
319.3343 m | 319.34658 | -0.0123 m | 0.0123 m |
319.5202 m | 319.508124 | 0.0121 m | 0.0121 m |
319.3553 m | 319.3673064 | -0.012 m | 0.012 m |
319.6029 m | 319.5931632 | 0.0098 m | 0.0098 m |
320.6794 m | 320.6715456 | 0.0079 m | 0.0079 m |
320.6127 m | 320.6047944 | 0.0079 m | 0.0079 m |
319.3625 m | 319.3548096 | 0.0077 m | 0.0077 m |
319.3194 m | 319.3118328 | 0.0075 m | 0.0075 m |
319.2834 m | 319.2908016 | -0.0074 m | 0.0074 m |
320.545 m | 320.5377384 | 0.0072 m | 0.0072 m |
319.9235 m | 319.916556 | 0.007 m | 0.007 m |
320.5063 m | 320.4996384 | 0.0066 m | 0.0066 m |
319.3804 m | 319.3865088 | -0.0061 m | 0.0061 m |
319.3794 m | 319.3752312 | 0.0042 m | 0.0042 m |
319.2991 m | 319.3032984 | -0.0042 m | 0.0042 m |
320.1237 m | 320.1195528 | 0.0042 m | 0.0042 m |
320.2936 m | 320.2905456 | 0.0031 m | 0.0031 m |
320.4913 m | 320.494152 | -0.0029 m | 0.0029 m |
319.2922 m | 319.290192 | 0.002 m | 0.002 m |
319.5792 m | 319.5806664 | -0.0014953613 m | 0.0014953613 m |
319.6067 m | 319.6080984 | -0.0014343262 m | 0.0014343262 m |
319.3136 m | 319.3127472 | 0.0008544922 m | 0.0008544922 m |
319.5406 m | 319.5407376 | -0.0000915527 m | 0.0000915527 m |
If we look at the data closer, we can see that not all these hard surface shots are created equal. There are 12 shots on the catch basins, which could be more difficult than the other hard surfaces.
The RMSE of the catch basin shots is 0.044 feet.
LIDAR_ELEV | ELEVATION | ELEV_DIFF | ELEV_DIFF_ABS |
319.2807 m | 319.3121376 | -0.0315 m | 0.0315 m |
319.2994 m | 319.2783048 | 0.0211 m | 0.0211 m |
319.2637 m | 319.2798288 | -0.0161 m | 0.0161 m |
319.3343 m | 319.34658 | -0.0123 m | 0.0123 m |
319.3553 m | 319.3673064 | -0.012 m | 0.012 m |
319.3625 m | 319.3548096 | 0.0077 m | 0.0077 m |
319.3194 m | 319.3118328 | 0.0075 m | 0.0075 m |
319.2834 m | 319.2908016 | -0.0074 m | 0.0074 m |
319.3794 m | 319.3752312 | 0.0042 m | 0.0042 m |
319.2991 m | 319.3032984 | -0.0042 m | 0.0042 m |
319.2922 m | 319.290192 | 0.002 m | 0.002 m |
319.3136 m | 319.3127472 | 0.0008544922 m | 0.0008544922 m |
Taking the catch basins out of the set and looking at the remaining hard surface shots we see an RMSE of 0.029 feet.
LIDAR_ELEV | ELEVATION | ELEV_DIFF | ELEV_DIFF_ABS |
320.713 m | 320.6916624 | 0.0213 m | 0.0213 m |
319.7273 m | 319.7117304 | 0.0155 m | 0.0155 m |
319.5202 m | 319.508124 | 0.0121 m | 0.0121 m |
319.6029 m | 319.5931632 | 0.0098 m | 0.0098 m |
320.6794 m | 320.6715456 | 0.0079 m | 0.0079 m |
320.6127 m | 320.6047944 | 0.0079 m | 0.0079 m |
320.545 m | 320.5377384 | 0.0072 m | 0.0072 m |
319.9235 m | 319.916556 | 0.007 m | 0.007 m |
320.5063 m | 320.4996384 | 0.0066 m | 0.0066 m |
319.3804 m | 319.3865088 | -0.0061 m | 0.0061 m |
320.1237 m | 320.1195528 | 0.0042 m | 0.0042 m |
320.2936 m | 320.2905456 | 0.0031 m | 0.0031 m |
320.4913 m | 320.494152 | -0.0029 m | 0.0029 m |
319.5792 m | 319.5806664 | -0.0014953613 m | 0.0014953613 m |
319.6067 m | 319.6080984 | -0.0014343262 m | 0.0014343262 m |
319.5406 m | 319.5407376 | -0.0000915527 m | 0.0000915527 m |
If you would like to see the full data set or any sample data, request the hard surfaces data here.
]]>
How to Setup the RS2+ as a Rover
How to Setup the RS2+ as a Base
How to Setup the RS2+ as a Base for your Drone
]]>
First, we need to export the project as a CSV file. Open that exported file in your spreadsheet software (I am using google sheets). If you used Emlid Flow to gather the data your sheet should be formatted like this:
From the spreadsheet we will nullify the Northing, Easting, and Elevation values for our points.
We then will open a new project with the coordinate system we need the deliverable to be in and import our edited CSV file. The absent data will force Emlid Flow to use the Lat/Long & Ellipsoidal Height data and automatically convert the Northing, Easting, and Elevation data into our new coordinate system. When we export and open the new file we can see that the coordinates have successfully been converted.
This method can also be utilized with other software suites that are not formatted the same as Emlid Flow or to convert state plane coordinates that don’t have an associated latitude and longitude with an added step to manually format our points.
As you can see the format of these points is very different from our earlier project, we are only given coordinates from the incorrect system. We will need the lat/long coordinates to convert using the same method as before. The solution is to format our CSV file in the same manner as Emlid Flow being conscious of the Northing and Easting placements on the file. Using those points our manually formatted file looks like this:
We will then import this file into a new project on Emlid Flow using the same (incorrect) coordinate system it was gathered with. This will now force Emlid Flow to populate the lat/long and ellipsoidal height that we will need to convert it into the target coordinate system. We will then repeat the process from above to convert into our final correct coordinate system.
]]>
The base DJI Mavic 3 Enterprise price is $3628 with Care Basic. Notably, this includes the DJI RC Pro controller with the built-in screen. It also includes a hard carrying case that fits up to seven batteries. See the product page for the full list of included items.
The same base package can be upgraded to include Care Basic for 2 years or Care Plus. The Mavic 3 Enterprise with Care Basic for 2-years costs $3788. The price of the Mavic 3 Enterprise with Care Plus is $3958.
If you want to add RTK capabilities, and already have a compatible base station or NTRIP network, you will just need to add the Mavic 3 Enterprise Series RTK Module to the price of any of the above packages. The price of the M3E with Care Basic and RTK Module is $4337.
If you also need a base station, the Emlid Reach RS2+ with pole tripod and rod, will complete the package. The price of the M3E with Care Basic, RTK Module, RS2+, pole tripod and rod (M3E RTK with Base) is $7414.
The other common add on is the Mavic 3 Enterpries Series Battery Kit at $659. This includes a battery charging hub and 3 batteries.
What's the difference between Care Basic and Care Plus?
The main differences between Care Basic vs Care Plus, are that Care Plus has unlimited replacements at no cost, while Care Basic has 2 Low Cost replacements, and that you can share coverage across other drones that also have Care Plus, while Care Basic does not share coverage. See the service plan details here.
When do you need RTK?
The short answer is; anytime that you need accurately scaled data. There are exceptions, but if you are plugging your imagery into a photogrammetry software such as Agisoft Metashape, Pix4D, or DroneDeploy, tagging your images with RTK precision is going to improve your workflow and end results.
If you are interested in horizontal accuracies of about a half inch and vertical accuracies under a tenth of a foot, then RTK tagged imagery is something worth looking into further. For those accuracies, using a non-RTK drone, we typically suggest placing Ground Control Points in a grid fashion with no greater separation than 500 feet between. Using RTK enabled drones we can reduce this to as little as 1 Ground Control Point per project, used in order to translate all the elevations. In some instances, such as stockpile measurements, or 2D drawings, you may not even need 1 GCP.
See our RTK accuracy tests here.
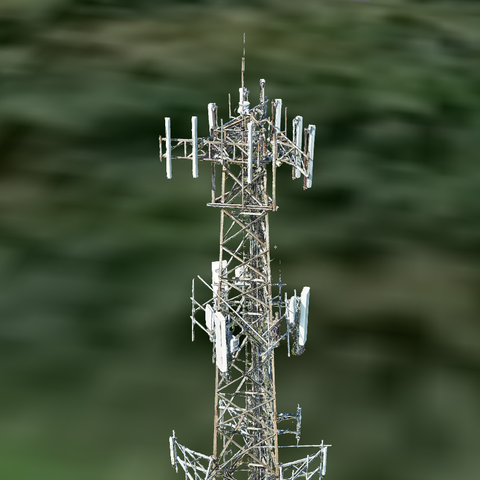
What is RTK/PPK?
RTK/PPK positioning is method used to achieve cm level precision with GNSS receivers. It requires one receiver that is stationary (base station) and one that is used to store positioning date (rover). On the M3E RTK the drone GNSS receiver is the rover. The base sends information to the rover and the rover calculated a new position with that added information.
If the rover does not have a base, the solutions status is Autonomous or sometimes referred to as Single. Accuracy with a Single solution is in the area of 5+ feet. If the rover is receiving information from the base station but they are not seeing enough strong signals of the like satellites, the rover will end up with a Float solution, with accuracies of 1+ feet. This may happen if the rover is brought under very dense tree canopy where satellite signals are blocked. If there are enough shared satellites in view, your rover will have a FIX solution, resulting in cm accuracy.
NTRIP or network RTK services have base stations throughout a region. These base stations broadcast information over the internet that your rover can use to get a FIX position. The other option is to use your own base station.
When can you use NTRIP as a base station?
Many states have free NTRIP services available. See our growing list of instructions on connecting to those networks. You may still want to use an NTRIP network even if there is a cost. The benefits are that you don't have to have your own base station, and you don't have to set up your own base. Setup is typically simple, but if you need global accuracy, your base will need a known point. That isn't too much trouble, but still requires extra work, compared to using an NTRIP service. NTRIP requires internet access, so if you are frequently on sites without cell coverage, it may not be the best solution.
What about PPK?
In most cases, you will want to run your own base station in order to process PPK. While you have access to a number of logs from base stations across the US, they are not densely distributed enough that you can guarantee a short enough baseline. In addition, many of these base stations track only GPS and GLONASS, or even just GPS. All this to say, without your own base, it is less a guarantee that you will leave the job site with the information needed to process cm level accurate image locations.
Some states have free VRS RINEX data. While VRS is imperfect, it is typically reliable enough for most jobs. The VRS data uses multiple base stations and creates a virtual base on the job site. This eliminates the issue of a long baseline. This would be more reliable than using the NGS available base station data as referenced previously.
Any receiver that can store RINEX observation data, can act as a base for PPK processing. This includes the Reach RS2+. In terms of PPK processing and RTK for that matter, having a base station on site is the best solution. It guarantees a short baseline without using VRS, and if you are using a newer receiver such as the RS2+, you will be storing all constellations, resulting in the best positioning.
When should you use your own base?
If you are planning on using PPK, and don't have the VRS RINEX option, then then having your own base is likely a necessity, for the reasons outlined above.
If there is no free NTRIP service available, and the cost of the available sources is too expensive, you will need to run your own base for RTK corrections.
If you run into situations where you want to run RTK in an area that does not have cell coverage, you will need to run your own base station. Cell coverage is a requirement for NTRIP services.
As mentioned previously, VRS is typically better than a single base station over a long baseline, but having a base on site is better than both cases. If you want to ensure the highest accuracies, using your own base is the most accurate solution.
]]>
In order to sign up for WVRTN, register here.
You will receive multiple emails. The pertinent information is the username and password. The address, port, and mount point will stay the same indefinitely.
Entering the NTRIP credentials for your drone or Emlid device will be very similar. We will show an example with Emlid. On the DJI app you will enter the credentials under the RTK settings and Select RTK Service Type Custom Network RTK.
For the Emlid Reach receivers the NTRIP credentials may be entered in Emlid Flow, MicroSurvey FieldGenius, Carlson, or another data collector. In this example we will look at Emlid Flow.
NTRIP corrections require internet access. Make sure your phone/tablet has cell service or is connected to a hotspot. Connect to the Reach receiver over bluetooth, set the Correction Input to NTRIP over Bluetooth. Add the WVRTN credentials in a new NTRIP profile.
NTRIP over BT with RS2 Video Below
NTRIP Corrections for DJI RTK Video Below
The profile name is arbitrary. If the address, port, or mount point changes for any reason, you will be notified by WVDOT. West Virginia only offers VRS mount points. The network uses multiple surrounding base stations to create a virtual base station on site. This is a way to reduce the effect of longer baselines, and requires less physical base stations throughout the state. Emlid receivers require a mount point in RTCM3 format. rtxRTCM3_2 is in RTCM3 format and is a full constellation setup, rather than the older mount point which only offered GPS and GLONASS.
]]>In order to sign up for MnCORS, register here.
You will receive multiple emails. The pertinent information is the username and password. The address, port, and mount point will stay the same indefinitely.
Entering the NTRIP credentials for your drone or Emlid device will be very similar. We will show an example with Emlid. On the DJI app you will enter the credentials under the RTK settings and Select RTK Service Type Custom Network RTK.
For the Emlid Reach receivers the NTRIP credentials may be entered in Emlid Flow, MicroSurvey FieldGenius, Carlson, or another data collector. In this example we will look at Emlid Flow.
NTRIP corrections require internet access. Make sure your phone/tablet has cell service or is connected to a hotspot. Connect to the Reach receiver over bluetooth, set the Correction Input to NTRIP over Bluetooth. Add the MnCORS credentials in a new NTRIP profile.
NTRIP over BT with RS2 Video Below
NTRIP Corrections for DJI RTK Video Below
The profile name is arbitrary. If the address, port, or mount point changes for any reason, you will be notified by MnDOT. Minnesota only offers VRS mount points. The network uses multiple surrounding base stations to create a virtual base station on site. This is a way to reduce the effect of longer baselines, and requires less physical base stations throughout the state. Emlid receivers require a mount point in RTCM3 format. RTCM_32_NAD83(2011) is in RTCM3 format and can be used with DJI and Emlid receivers.
]]>In order to sign up for MDOT CORS, create an account here.
Subscribe to All RTN and RINEX Products
Go to Account Details > User Profile and record the NTRIP username and NTRIP password. This will be used in the NTRIP profile.
Entering the NTRIP credentials for your drone or Emlid device will be very similar. We will show an example with Emlid. On the DJI app you will enter the credentials under the RTK settings and Select RTK Service Type Custom Network RTK.
For the Emlid Reach receivers the NTRIP credentials may be entered in Emlid Flow, MicroSurvey FieldGenius, Carlson, or another data collector. In this example we will look at Emlid Flow.
NTRIP corrections require internet access. Make sure your phone/tablet has cell service or is connected to a hotspot. Connect to the Reach receiver over bluetooth, set the Correction Input to NTRIP over Bluetooth. Add the NYSNet credentials in a new NTRIP profile.
NTRIP over BT with RS2 Video Below
NTRIP Corrections for DJI RTK Video Below
The profile name is arbitrary. If the address, port, or mount point changes for any reason, you will be notified by NYSNet. New York offers network mount points. The network uses multiple surrounding base stations to create a virtual base station on site. This is a way to reduce the effect of longer baselines, and requires less physical base stations throughout the state. Emlid receivers require a mount point in RTCM3 format. net_msm_vrs is in RTCM3 format and includes GPS and GLONASS, as well as BeiDou in some circumstances.
]]>
In order to sign up for IaRTN, create an account here.
Subscribe to IARTN RTK and RINEX Products
Go to Account Details > User Profile and record the NTRIP username and NTRIP password. This will be used in the NTRIP profile.
Entering the NTRIP credentials for your drone or Emlid device will be very similar. We will show an example with Emlid. On the DJI app you will enter the credentials under the RTK settings and Select RTK Service Type Custom Network RTK.
For the Emlid Reach receivers the NTRIP credentials may be entered in Emlid Flow, MicroSurvey FieldGenius, Carlson, or another data collector. In this example we will look at Emlid Flow.
NTRIP corrections require internet access. Make sure your phone/tablet has cell service or is connected to a hotspot. Connect to the Reach receiver over bluetooth, set the Correction Input to NTRIP over Bluetooth. Add the IaRTN credentials in a new NTRIP profile.
NTRIP over BT with RS2 Video Below
NTRIP Corrections for DJI RTK Video Below
The profile name is arbitrary. If the address, port, or mount point changes for any reason, you will be notified by IADOT. Iowa offers network mount points. The network uses multiple surrounding base stations to create a virtual base station on site. This is a way to reduce the effect of longer baselines, and requires less physical base stations throughout the state. Emlid receivers require a mount point in RTCM3 format. MSM_IMAX is in RTCM3 format and is a full constellation setup, rather than the older mount point which only offered GPS and GLONASS.
]]>
In order to sign up for InCORS, fill out the form here and email to incors@indot.in.gov.
You will receive an email with your credentials.
Entering the NTRIP credentials for your drone or Emlid device will be very similar. We will show an example with Emlid. On the DJI app you will enter the credentials under the RTK settings and Select RTK Service Type Custom Network RTK.
For the Emlid Reach receivers the NTRIP credentials may be entered in Emlid Flow, MicroSurvey FieldGenius, Carlson, or another data collector. In this example we will look at Emlid Flow.
NTRIP corrections require internet access. Make sure your phone/tablet has cell service or is connected to a hotspot. Connect to the Reach receiver over bluetooth, set the Correction Input to NTRIP over Bluetooth. Add the InCORS credentials in a new NTRIP profile.
NTRIP over BT with RS2 Video Below
NTRIP Corrections for DJI RTK Video Below
The profile name is arbitrary. If the address, port, or mount point changes for any reason, you will be notified by InDOT. Indiana offers network mount points. The network uses multiple surrounding base stations to create a virtual base station on site. This is a way to reduce the effect of longer baselines, and requires less physical base stations throughout the state. Emlid receivers require a mount point in RTCM3 format. RTCM3_MAX is in RTCM3 format and uses GPS and GLONASS.
]]>In order to sign up for MaCORS, create an account here.
Subscribe to GNSS Real-Time (RTK) Corrections
Go to Account Details > User Profile and record the NTRIP username and NTRIP password. This will be used in the NTRIP profile.
Entering the NTRIP credentials for your drone or Emlid device will be very similar. We will show an example with Emlid. On the DJI app you will enter the credentials under the RTK settings and Select RTK Service Type Custom Network RTK.
For the Emlid Reach receivers the NTRIP credentials may be entered in Emlid Flow, MicroSurvey FieldGenius, Carlson, or another data collector. In this example we will look at Emlid Flow.
NTRIP corrections require internet access. Make sure your phone/tablet has cell service or is connected to a hotspot. Connect to the Reach receiver over bluetooth, set the Correction Input to NTRIP over Bluetooth. Add the MaCORS credentials in a new NTRIP profile.
NTRIP over BT with RS2 Video Below
NTRIP Corrections for DJI RTK Video Below
The profile name is arbitrary. If the address, port, or mount point changes for any reason, you will be notified by MassDOT. MA offers network mount points. The network uses multiple surrounding base stations to create a virtual base station on site. This is a way to reduce the effect of longer baselines, and requires less physical base stations throughout the state. Emlid receivers require a mount point in RTCM3 format. RTCM3MSM_IMAX is in RTCM3 format and is a full constellation setup, rather than the older mount point which only offered GPS and GLONASS.
]]>
In order to sign up for FPRN, create an account here.
Subscribe to NAD83 Corrections
Go to Account Details > User Profile and record the NTRIP username and NTRIP password. This will be used in the NTRIP profile.
Entering the NTRIP credentials for your drone or Emlid device will be very similar. We will show an example with Emlid. On the DJI app you will enter the credentials under the RTK settings and Select RTK Service Type Custom Network RTK.
For the Emlid Reach receivers the NTRIP credentials may be entered in Emlid Flow, MicroSurvey FieldGenius, Carlson, or another data collector. In this example we will look at Emlid Flow.
NTRIP corrections require internet access. Make sure your phone/tablet has cell service or is connected to a hotspot. Connect to the Reach receiver over bluetooth, set the Correction Input to NTRIP over Bluetooth. Add the FPRN credentials in a new NTRIP profile.
NTRIP over BT with RS2 Video Below
NTRIP Corrections for DJI RTK Video Below
The profile name is arbitrary. If the address, port, or mount point changes for any reason, you will be notified by FPRN. Florida offers network mount points. The network uses multiple surrounding base stations to create a virtual base station on site. This is a way to reduce the effect of longer baselines, and requires less physical base stations throughout the state. Emlid receivers require a mount point in RTCM3 format. RTCM3_VRS is in RTCM3 format.
]]>
In order to sign up for WISCORS, register here.
You will receive multiple emails. The pertinent information is the username and password. The address, port, and mount point will stay the same indefinitely.
Entering the NTRIP credentials for your drone or Emlid device will be very similar. We will show an example with Emlid. On the DJI app you will enter the credentials under the RTK settings and Select RTK Service Type Custom Network RTK.
For the Emlid Reach receivers the NTRIP credentials may be entered in Emlid Flow, MicroSurvey FieldGenius, Carlson, or another data collector. In this example we will look at Emlid Flow.
NTRIP corrections require internet access. Make sure your phone/tablet has cell service or is connected to a hotspot. Connect to the Reach receiver over bluetooth, set the Correction Input to NTRIP over Bluetooth. Add the WISCORS credentials in a new NTRIP profile.
NTRIP over BT with RS2 Video Below
NTRIP Corrections for DJI RTK Video Below
The profile name is arbitrary. If the address, port, or mount point changes for any reason, you will be notified by WISCORS. Wisconsin offers VRS mount points. The network uses multiple surrounding base stations to create a virtual base station on site. This is a way to reduce the effect of longer baselines, and requires less physical base stations throughout the state. Emlid receivers require a mount point in RTCM3 format. RTCM32 is in RTCM3 format and uses GPS, GLONASS, and Galileo, rather than the older mount point which only offered GPS and GLONASS.
]]>In order to sign up for KYCORS, register here.
You will receive multiple emails. The pertinent information is the username and password. The address, port, and mount point will stay the same indefinitely.
Entering the NTRIP credentials for your drone or Emlid device will be very similar. We will show an example with Emlid. On the DJI app you will enter the credentials under the RTK settings and Select RTK Service Type Custom Network RTK.
For the Emlid Reach receivers the NTRIP credentials may be entered in Emlid Flow, MicroSurvey FieldGenius, Carlson, or another data collector. In this example we will look at Emlid Flow.
NTRIP corrections require internet access. Make sure your phone/tablet has cell service or is connected to a hotspot. Connect to the Reach receiver over bluetooth, set the Correction Input to NTRIP over Bluetooth. Add the KYCORS credentials in a new NTRIP profile.
NTRIP over BT with RS2 Video Below
NTRIP Corrections for DJI RTK Video Below
The profile name is arbitrary. If the address, port, or mount point changes for any reason, you will be notified by KYCORS. Kentucky only offers VRS mount points. The network uses multiple surrounding base stations to create a virtual base station on site. This is a way to reduce the effect of longer baselines, and requires less physical base stations throughout the state. Emlid receivers require a mount point in RTCM3 format. RTX_RTCM3_2 is in RTCM3 format and is a full constellation setup, rather than the older mount point which only offered GPS and GLONASS.
]]>In order to sign up for ODOT VRS, fill out the login form here.
You will receive multiple emails. The pertinent information is the username and password. The address, port, and mount point will stay the same indefinitely.
Entering the NTRIP credentials for your drone or Emlid device will be very similar. We will show an example with Emlid. On the DJI app you will enter the credentials under the RTK settings and Select RTK Service Type Custom Network RTK.
For the Emlid Reach receivers the NTRIP credentials may be entered in Emlid Flow, MicroSurvey FieldGenius, Carlson, or another data collector. In this example we will look at Emlid Flow.
NTRIP corrections require internet access. Make sure your phone/tablet has cell service or is connected to a hotspot. Connect to the Reach receiver over bluetooth, set the Correction Input to NTRIP over Bluetooth. Add the ODOT VRS credentials in a new NTRIP profile.
NTRIP over BT with RS2 Video Below
NTRIP Corrections for DJI RTK Video Below
The profile name is arbitrary. If the address, port, or mount point changes for any reason, you will be notified by ODOT. Ohio only offers VRS mount points. The network uses multiple surrounding base stations to create a virtual base station on site. This is a way to reduce the effect of longer baselines, and requires less physical base stations throughout the state. Emlid receivers require a mount point in RTCM3 format. ODOT_G_R_E_C_RTX_RTCM3 is in RTCM3 format and is a full constellation setup, rather than the older mount point which only offered GPS and GLONASS.
]]>In order to sign up for MDOT CORS, create an account here.
Subscribe to MSM4 (Standard GNSS messages) RTCM3.
Go to Account Details > User Profile and record the NTRIP username and NTRIP password. This will be used in the NTRIP profile.
Entering the NTRIP credentials for your drone or Emlid device will be very similar. We will show an example with Emlid. On the DJI app you will enter the credentials under the RTK settings and Select RTK Service Type Custom Network RTK.
For the Emlid Reach receivers the NTRIP credentials may be entered in Emlid Flow, MicroSurvey FieldGenius, Carlson, or another data collector. In this example we will look at Emlid Flow.
NTRIP corrections require internet access. Make sure your phone/tablet has cell service or is connected to a hotspot. Connect to the Reach receiver over bluetooth, set the Correction Input to NTRIP over Bluetooth. Add the MDOT CORS credentials in a new NTRIP profile.
NTRIP over BT with RS2 Video Below
NTRIP Corrections for DJI RTK Video Below
The profile name is arbitrary. If the address, port, or mount point changes for any reason, you will be notified by MDOT. Michigan offers network mount points. The network uses multiple surrounding base stations to create a virtual base station on site. This is a way to reduce the effect of longer baselines, and requires less physical base stations throughout the state. Emlid receivers require a mount point in RTCM3 format. NS-IMAX-MSM4 is in RTCM3 format and is a full constellation setup, rather than the older mount point which only offered GPS and GLONASS.
]]>
X-TILT uses the sensors on your Android device for tilt compensation on your GNSS receiver. Simply collect two shots of the same point at two different angles, and X-TILT does the rest. Check out the video below to see how it works.
The tilted pole shots must be accurate in order to be useful for building corners and other hard to reach shots. To test the accuracy of the X-TILT function, we compared level shots and tilted shots with points collected with a robotic total station.
Using two control points, we ran a resection with the GeoMax Zoom95 Robotic Total Station. Then, we collected ten points with the Zoom95 in order to compare the GNSS shots taken.
Next the Reach RS2+ was used by leveling the rod and storing points at each of the ten locations. Finally the RS2+ was used again, this time tilting the rod and using the X-TILT function to compensate for the tilt.
The root mean squared error in feet for the RS2+ without tilt in the Northing, Easting and Elevation, was 0.04', 0.10', and 0.03' respectively.
The root mean squared error in feet for the RS2+ using X-TILIT in the Northing, Easting and Elevation, was 0.02', 0.08', and 0.03' respectively.
The results of this test show that the RS2+ maintains high accuracy using the tilt compensation of the X-TILT function.
The shot-by-shot results are shown below.
Control | |||
1000 | 572468.309 | 2205741.687 | 1192.149 |
1001 | 572586.441 | 2205756.001 | 1195.344 |
GNSS No Tilt | |||
100 | 572486.405 | 2205757.285 | 1192.964 |
101 | 572501.161 | 2205757.031 | 1193.774 |
102 | 572508.558 | 2205756.911 | 1194.181 |
103 | 572515.879 | 2205756.79 | 1194.592 |
104 | 572525.85 | 2205756.691 | 1194.685 |
105 | 572534.973 | 2205756.603 | 1194.758 |
106 | 572544.115 | 2205756.541 | 1194.895 |
107 | 572561.178 | 2205756.34 | 1195.084 |
108 | 572569.602 | 2205756.237 | 1195.16 |
109 | 572578.139 | 2205756.132 | 1195.274 |
Tilt | |||
OFS_0001 | 572486.411 | 2205757.323 | 1192.984 |
OFS_0002 | 572501.21 | 2205757.048 | 1193.789 |
OFS_0003 | 572508.59 | 2205756.917 | 1194.195 |
OFS_0004 | 572515.935 | 2205756.828 | 1194.563 |
OFS_0005 | 572525.901 | 2205756.714 | 1194.69 |
OFS_0006 | 572535.015 | 2205756.627 | 1194.748 |
OFS_0007 | 572544.121 | 2205756.554 | 1194.903 |
OFS_0008 | 572561.183 | 2205756.365 | 1195.1 |
OFS_0009 | 572569.631 | 2205756.292 | 1195.15 |
OFS_0010 | 572578.154 | 2205756.178 | 1195.26 |
Robot | |||
200 | 572486.412 | 2205757.416 | 1192.958 |
201 | 572501.184 | 2205757.152 | 1193.764 |
202 | 572508.606 | 2205757.015 | 1194.18 |
203 | 572515.931 | 2205756.89 | 1194.544 |
204 | 572525.898 | 2205756.792 | 1194.691 |
205 | 572535.018 | 2205756.706 | 1194.742 |
206 | 572544.158 | 2205756.632 | 1194.854 |
207 | 572561.2 | 2205756.414 | 1195.045 |
208 | 572569.649 | 2205756.331 | 1195.118 |
209 | 572578.21 | 2205756.218 | 1195.238 |
The Mavic 3 Enterprise includes the zoom camera as a secondary sensor. The Mavic 3 Multispectral includes 5 cameras in total. It includes the 20 MP RGB camera mentioned above, and 4 single band sensors at 5 MP per sensor. Those bands are green, red, red edge, and near infrared. With these sensor you can calculate different indices. including NDVI, NDRE, GNDVI. This added information can help in a range of situations: early weed emergence, crop health, and even locating drainage tile.
We ran a test flight with the Mavic 3 Multispectral in August here in OH.
Mavic 3 Multispectral Sample Data
We'll look at a few use cases for this data, starting with the true color camera.
One good case for the RGB, is simply drawing a polygon around the crop, so that it can be used later for spraying with the Agras T40. Because of the RTK capabilities on the M3M, we can expect are polygon to be accurate to within about an inch. Likewise, the T40 also includes an RTK module. By importing the polygon into the flight plan for the T40 we can optimize are flight, so that we are not over or under spraying, as well as avoiding any trees along that may be in play with the T40.
The NDVI map can exaggerate subtle issues that may not be identifiable on the RGB map.
]]>
This won't be an exhaustive list of all the minor changes, but rather hit on key changes and updates.
ReachView3 > Emlid Flow Standard - This is really just a name change. You can still use Emlid Flow just like ReachView3 and it is free forever. One new thing you will see are new features available for Flow Survey and the option to pay for the upgrade to Flow Survey.
Emlid Flow Survey - Emlid Flow Survey includes a handful of new features that you must pay to unlock ($25/month or $240/year). The new feature breakdown and comparison can be found here.
Firmware Updating Update - This is most useful for first time setup. In the past, the fist time update required you to connect the RS2 to the internet in order to finish the first time use process. This step has always been less than ideal. With this update, you don't need to connect the RS2 to the internet in order to update it. Run a firmware reflash in order to update the unit to the latest firmware. Then, when you connect to the RS2 you can skip step 2 where it asks to connect to the internet. Just tap on the number 3 and it will pass you to the next step.
Faster Boot Time - The RS2 boots faster.
Battery Indication Improvement - Some battery indication bugs have been fixed on this version. If your battery doesn't indicate a full charge after overnight charging, or if there is a major LED drop after just a short time in the cold, this update may solve that issue.
Bluetooth Connection to RS2/RS2+ - For existing users who are quite comfortable with the Wi-Fi method, there isn't any great urgency to start using Bluteooth, but for new users, this smooths out some issues. It allows you to connect the RS2 to Emlid Flow over bluetooth. There are some panels in Emlid Flow that you can't access over bluetooth, so you will still have to use WiFi for those. But, one important function is the NTRIP over Bluetooth option. Now when you want to provide NTRIP (aka VRS) corrections to the RS2, as long as the phone/tablet has internet access it will transmit those to the RS2 over bluetooth. There is no need to connect a hotspot to the RS2, or insert a SIM card. Emlid hasn't given this a great deal of publicity. Perhaps it is still in a sort of beta process now, but it seems to work really well and it is on the stable version of firmware. You do have to go to a hidden panel on Emlid Flow in order to enable the bluetooth connection. See the video below on NTRIP over Bluetooth to see how to activate and use it.
Local NTRIP V2.0 - This allows you to connect your Autel RTK drone to the RS2 over local NTRIP (no internet required), whereas before you had to use Emlid Caster (internet required). This will work just like it does with DJI RTK drones as shown in the below video.
]]>RS2+
RS2
Multi-band network receiver;
Tracks: GPS, GLONASS, Galileo & BeiDou
√
√
√
√
LoRa Radio
√
√
Data logging for post-processing
√
√
Cell Modem
LTE Cell Modem
3.5 G Cell Modem
Internet Connection
-Internal SIM Card
-Hotspot
-Data collector’s internet connection
-
-Hotspot
-Data collector’s internet connection
Battery Life
16 hrs network rover
22 hrs static
16 hrs network rover
22 hrs static
Weatherproof Rating
IP67
IP67
Here is what you’ll need to get started after receiving your network rover configuration of the Reach RS2+ with FieldGenius for Android and E38 Survey Solutions setup.
Before you begin, make sure your tablet is connected to the internet through a hotspot or SIM card.
Here is what you’ll need to do to get started after receiving your base rover configuration of the Reach RS2+ with FieldGenius for Android and E38 Survey Solutions setup.
RX
RS2+
Multi-band network receiver;
Tracks: GPS, GLONASS, Galileo & BeiDou
√
√
√
√
LoRa Radio
-
√
Data logging for post-processing
-
√
LTE Modem
-
√
Battery Life
16 hrs
16 hrs as network rover, 22 hrs static
Weatherproof Rating
IP68
IP67